Connecting Jaspersoft Studio to CollectionSpace
Jaspersoft Studio is desktop software for designing reports using data from CollectionSpace. This guide shows the process of connecting Jaspersoft Studio to the CollectionSpace database. The steps are outlined in this step-by-step guide.
A screencast of the process can also be viewed via the CollectionSpace Vimeo page.
Prerequisites
- Download Jaspersoft Studio (and the Java Development Kit, if necessary). Details are provided in the Getting Started with Jaspersoft Studio documentation.
- Configure the CollectionSpace server to allow direct access to the Postgresql database. A username and optionally a password are also needed to connect the Postgresql database.
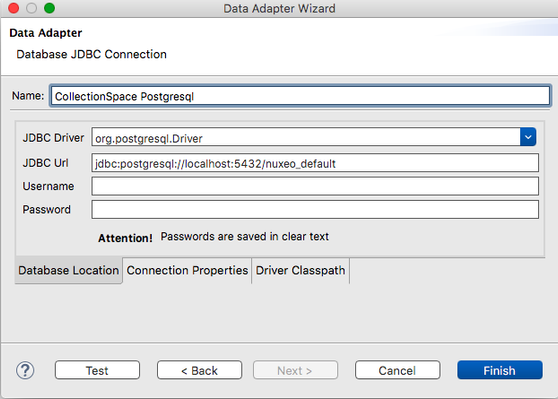
- Determine the "JDBC URL" for use in the connection process. A JDBC URL has the form
jdbc:postgresql://<hostname>:<port>/<database_name>where:<hostname>is the name of your CollectionSpace database server (typically the same as the CollectionSpace web server)<port>is the Postgresql database port, typically '5432'<database_name>is the name of the database where the CollectionSpace data is stored, typically 'nuxeo_default' unless this is an unusual CollectionSpace installation.
Step-by-step guide
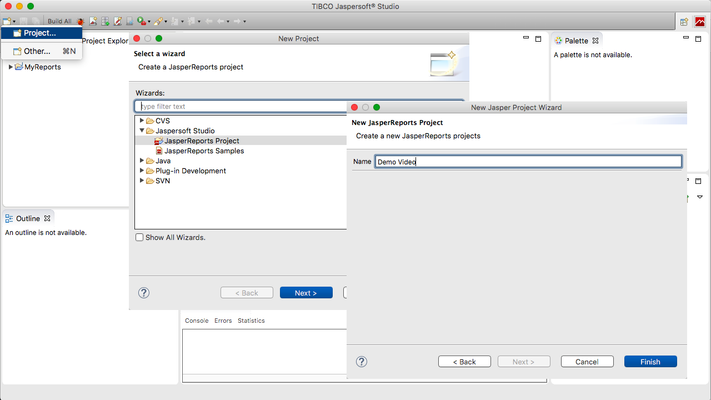
1. Start Jaspersoft Studio. From the "New item" icon in the upper left corner, select "Project..." Under the "Jaspersoft Studio" category, select `JasperReports Project` then "Next". Give the project a name ("Demo Video" in this example), then "Finish".
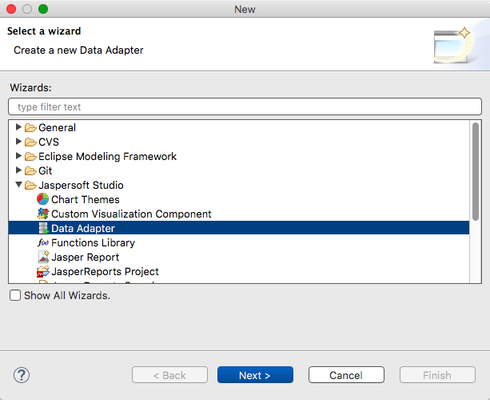
2. From the same "New item" icon, select "Other..."
3. Under the "Jaspersoft Studio" category, select `Data Adapter`
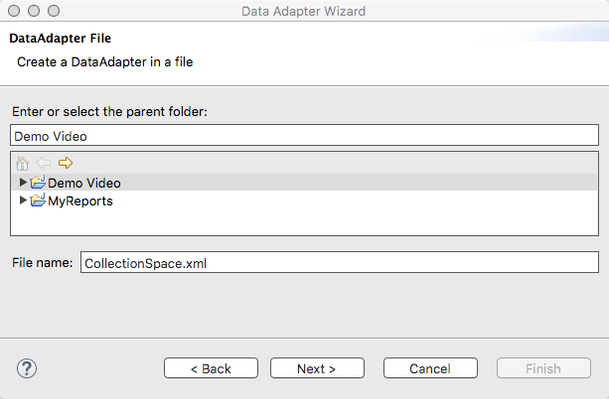
4. Select the project name from the previous step, use "CollectionSpace" as the file name, and select "Next"
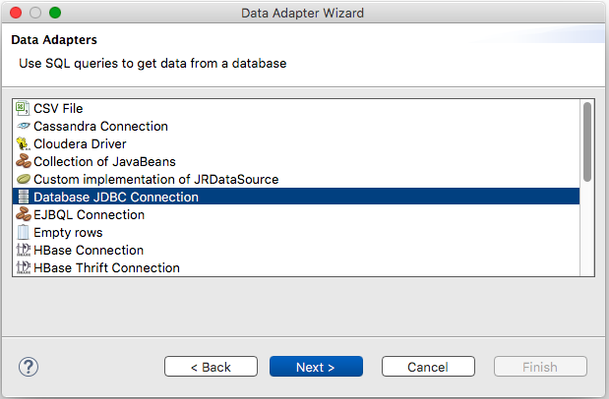
5. Select `Database JDBC Connection` then "Next"
6. Give the connector a name ("CollectionSpace Postgresql" in this example). From the list of JDBC Drivers, select `org.postgresql.Driver`. Put in the JDBC URL, Username and Password as given to you by your system manager. The "Test" button can be used to determine if all of the parameters are correct. Select "Finish"
